
news
Make Every Ride a Safe Ride in Less Time than You can make Maggi Noodles
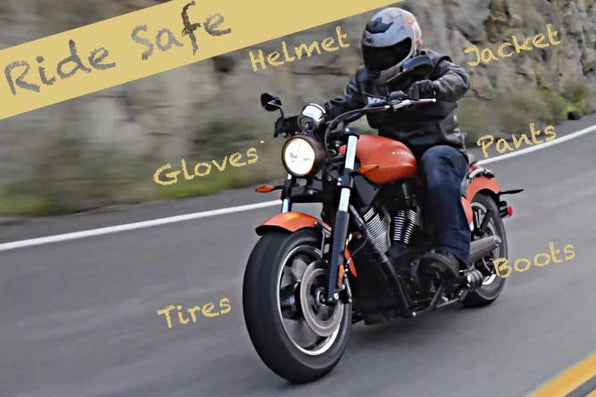
Based on the immensely popular T-CLOCS checklist by Motorcycle Safety Foundation (MSF) USA, here’s our super quick abridged version.
The difference between a good mechanic and a bad one, like the difference between a good mathematician and a bad one, is precisely this ability to select the good facts from the bad ones on the basis of quality.
Here we hope to be the good mechanic and help you prepare for a ride by checking key aspects of your motorcycle before you take her out for a spin.
This is the original MSF version which sure looks like a daunting list and to some it may seem like a chore. Read on to learn how to do some basic checks in under two minutes.

Tyres & Wheels
This is most wear & tear intensive part of a motorcycle. Any problems here can affect handling and can sometimes be the cause of a crash, hence it earns the first place.
If you have alloys, check for any signs of dings or deformities. For spoked wheels, spokes should be tight and straight. Keep a tyre pressure gauge handy and check pressure in both tyres. Always stick to recommended tyre pressure and also pay attention to ambient temperature conditions. Remember that an under inflated tyre causes the sidewalls of tyres to flex when the bike is in motion and causes the tyre to heat up significantly.
For multiple vehicle owners, remembering multiple tyre pressure values can be confusing, type out F & R values for each vehicle and send yourself a text message and save it on your mobile phone.
For the visual inspection part, learn to check tread depth. Many tyres come with a built in tread depth indicator. Check your tyre manufacturer’s documentation to see if yours came with one. Else keep a tread depth gauge handy. Minimum tread depth is around 2mm. Anything less, then you should consider changing your tyre.
Whilst you are at it, look out for any foreign objects stuck between the treads, such as small pebbles or even metal pieces. Ensure that there aren’t any nicks or cuts in the tyre. A DIY puncture repair kit in your tool kit when you ride is always a good idea.
Clutch & Cables
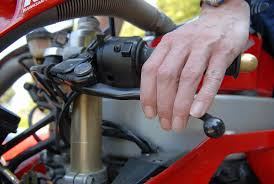
This is the second most critical and wear n’ tear intensive part of a motorcycle. Make sure that levers and cables feel smooth and are not jammed or produce any squeaking sounds. Do this by operating accelerator, clutch and brake mechanisms without starting the motorcycle.
Attend to any flaw immediately. A broken or jammed accelerator or clutch cable midway in a trip can render the motorcycle unusable or damage the clutch plates. Some motorcycle manufacturers specify the angle from the lever and maximum curvature in clutch and front brake cables. Make sure the cables are within the specified values.
Finally, test the front and rear brakes by operating the respective levers and pushing the bike forward, one lever at a time.
Lights

Finally its time to turn on the ignition and check the electricals on your bike. In one of the later posts we will talk about the perils of being an invisible biker. Lights play a very critical role in making sure that you are visible to others on the road.
After turning on ignition, check for any error lights or messages on the instrument console. Next move on to the lights. If possible, position the bike about 5m away from a wall and check operation of high & low beams of the headlight. Check the taillight and ensure brake light come on when you depress the brake pedal and lever. Check the trafficators, aka turn indicators – left, right, front and rear and hazard function if present.
Lastly, don’t forget to check the horn with a gentle and quick tap.
It is a good practise to carry a battery charger on long trips as well as a spare supply of common fuses and some common bulbs.
Once a month, check the battery and terminals for signs of oxidation or leaks. If you intend to store your motorcycle for a long time, disconnect the battery connections and put it on trickle charge using an appropriate battery charger.
Oil & Fuel
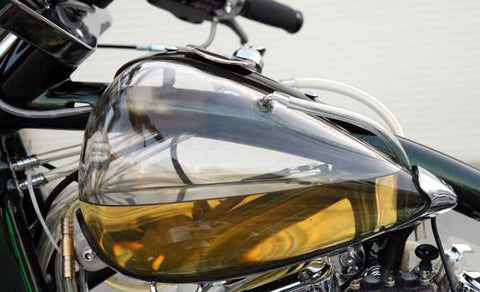
Check the fuel level in the tank if your motorcycle does not come with a fuel indicator display. Avoid using the motorcycle in ‘reserve’ conditions. This is due to several reasons – fuel consumption can vary due to riding conditions, Secondly some fuel pumps in modern bikes do not like to operate with very little fuel swishing around in the tank and can give up the ghost when you least expect it.
Develop the habit of using the trip meter if your bike comes with one or make use of smartphone apps like Fuelly to keep an eye on fuel usage.
Even more critical than fuel levels, is the engine oil level in a motorcycle. Depleted engine oil levels can cause irreversible damage to engine internals. Keep an eye on the oil level window before every ride. Do it while the bike is upright and the engine is switched off.
Whilst you are it, this might be a good time to run a sweeping glance over any other fluid indicator windows your bike might have such as front & rear brake reservoir fluid or coolants.
Chassis
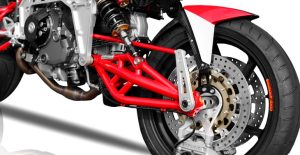
Chassis components typically include the frame, front and rear suspension, the power train e.g., chain or belt and all the visible bolts and fasteners.
Take the motorcycle off the stand and sit on it. Now apply the front brakes & gently rock the motorcycle back and forth. The suspension should move smoothly and relatively slowly with the typical resistance when you apply force to a spring loaded object. Look out for any unusual sounds or impediments to smooth motion. Attend to any suspected suspension issues immediately.
If you have an adjustable suspension, remember to read the owner’s manual and adjust it properly for the load you’ll be carrying and the type of riding you’ll be doing. Always carry the suspension adjustment wrench in your motorcycle tool kit.
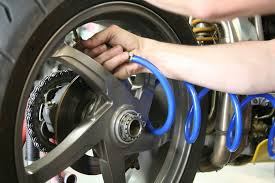
Check the motorcycle chain for slack and make sure it is at the correct tension. In a separate article we will cover how to clean and lube your chain regularly. In belt drive motorcycles, check for any signs of wear or nicks & cuts on the belt.
Run a sweeping glance to identify any loose fasteners or nuts. Its a good idea to re-tighten all bolts to recommend torque values as per service manuals and use thread lock fluid as appropriate after any DIY job.
Stand

Finally we come to the last item on the checklist and by now your Maggi noodles should be ready to eat. Check the side stand for any signs of damage or deformity. Test the spring mechanism to ensure that it can keep the side stand safely stowed away while the bike is in motion. Same rules apply if you have a centre stand.
If your motorcycle comes with a side stand indication on the console, check that it is operating as per normal. A handy little device to add to a side stand is the side stand foot, typically made of CNC alloy, which increases the surface area of the side stand in gravely or muddy areas and helps to keep the motorcycle stable. Do NOT sit or let anyone sit on the motorcycle with the side stand in place – this can bend or deform the side stand and cause the motorcycle to tip over.
If in the first few attempts, this check takes longer than a couple of minutes, do not despair and try to rush through it. Very soon it will become a habit and start happening like T-CLOCSwork, in a jiffy!
If your motorcycle has passed this abridged T-CLOCS check, you are now good to go and enjoy that well deserved ride!